Sometimes the pretty details that catch our attention are kind of big for 'details'. Really big. This is part one of a tutorial that outlines the process of transforming a very large design from the original artwork...

This art is property of CLAMP. Read Tsubasa Reservoir Chronicles!
...into real life.
Note: the example photos for this tutorial are for a different costume than the one shown above.
1. Don’t do this on the original pattern for your garment. You will need it in part two of this tutorial. Instead, make a copy. Here, the kind of pattern paper that resembles interfacing is shown.

I don’t actually recommend this type of pattern paper for designing appliqués. It catches on mostly everything—pencils, pens, etc.—making it incredibly difficult to draw smooth curves. You can’t erase, and it doesn’t absorb very well, so markers will smudge and smear. And because it’s so thin, more often than not, I found myself ripping holes in the paper. Instead, use brown parcel paper, Swedish tracing paper, or even newspaper. If it’s a symmetrical pattern, I especially recommend the Swedish tracing paper because its transparency will allow you to easily copy one side over to the other.
2. It's helpful to sketch out the overall pattern on a piece of paper first. Even if it’s just a rough guess of what the final design will be, it’s a good way to get your thoughts organized.
If you’ll notice, the board I have underneath has a grid. If you’re still new to drafting designs on a large scale, don’t be afraid to sketch grid lines onto the paper to help keep things in proportion. Since this is a cloak, I have very faint lines in a grid radiating from the center on the full-size pattern.

3. If you have another piece overlapping the design, make sure to note its position in relation to the appliqué. This will also help the transition from the smaller sketch to the pattern paper. Also mark the seam allowance, so your design doesn’t go onto an area that won’t be seen.

The pink and yellow pattern here is the overlapping piece. The green dashes mark where it sits on the garment that this applique will be sewn onto.
3. I sketch things out in pencil before going over with marker. That way, I can see what translates form the smaller sketch to the full-size design, what needs to be altered, if things can overlap and whatnot, before having the final line.
4. If your appliqué is mostly symmetrical but with asymmetrical detail in the middle, then go ahead and copy over the symmetrical parts of the design before working on the middle. That way, you won’t accidentally design over another part of the appliqué.
5. Remember when I mentioned that it would be good to note where any overlapping pieces would fall on the appliqué? More than likely, the reference art doesn't show what’s going on under that overlapping piece, but that doesn’t mean you shouldn’t put anything there. Unless that overlapping piece is basted down on top of the piece this appliqué will be sewn onto, people will see that mystery area and it will look weird if there isn’t anything there. Luckily, you’ve just been copying a huge design for the past half an hour, so you have a pretty good handle over the original art style.

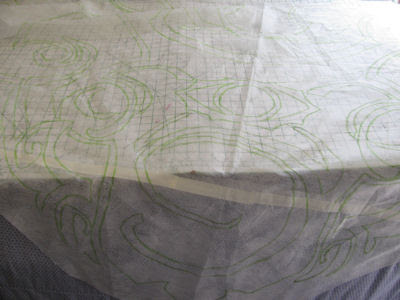
And here’s the final product! Or a part of it, anyways (my working area is about two feet longer than the garment.) Coming soon: how to transfer that crazy design onto the fabric.


0 comments:
Post a Comment